Friday, January 28, 2011

Follow Me Friday

Time for some linky fun...Follow Me Friday!
(I ALWAYS follow back)


BoostMyBlogFriday


Recipe: Corn Pudding


My family loves corn, whether it is on the cob (whole or niblet), whole kernel or creamed, frozen, or out the can.  I can cook it on the grill, boil it, roast it, fry it, put it in a stew...whatever way I make it they are going to love it.  There ABSOLUTE favorite way to eat it however is as a pudding.

I've made this recipe several times and it seems that each time I have to make a bigger batch.  So if your family loves corn or even just enjoys corn, give this recipe a try...I'm sure your family will love it!

Here's what you'll need...remember, I like quick and easy:

Ingredients

*2 cans of whole kernel corn
*2 cans of cream style corn
*6 large eggs (room temperature)
*1/3 cup of melted butter
*1/3 cup of granulated sugar
*1/2 cup of milk
*1/4 teaspoon of vanilla
*4 tablespoons of cornstarch

Putting It all Together

Preheat oven to 400 degrees F.  Lightly whisk the eggs in a large mixing bowl and add 1/2 cup of milk.  Next, whisk in your melted butter, being careful that the butter is not hot enough to cook the egg mixture, sugar and vanilla.  Then add your cornstarch until just mixed.  Lastly, add all of your cans of corn and blend well.  Pour your mixture into a greased casserole dish and bake for 1 hour.

This serves my family of five twice, which include a big ole' man, and a constantly hungry teenager.  I would say it serves about 8 folks comfortably.

It is served as a side dish, although my family will eat it for breakfast or lunch all by itself.
I hope your family likes this as much as my family does, let me know how it best fit at your table.

~Blessings~
Claudea B.


Thursday, January 27, 2011

Thursday Blog Hops

Thursday Blog Hops

I've decided to try something new and participate in several of the blog hops that are going on daily.  I'm going to be posting the one's that I've visited each day, so if you get a chance stop by and join the party!

Bassgiraffe's Thoughts Thursday Blog Hop


~Blessings~
Claudea B.


RJ's New Toy Fav: Cool Tool Activity Set

Inside of this little blue box is hours of fun for the little ones.  Okay, it may not be hours at a time of fun, but the time spent with this little box will definitely add up to hours.
This is the Cool Tool Activity Set that we got from Educational Toys Planet.  The price on this fun and educational toy is only $24.97 (on sale at the time of this post).

Just look at all the things there are to do inside:
This is a look inside of the colorful Cool Tool Activity Box.  It comes with a drill that makes real drilling sounds.  The little hammer, screw driver, and wrench which are the perfect size for little hands.  There are also movable gears that makes fun sounds, and the shape sorter that names the shape as it is placed into the correct slot. 

The picture on the Educational Toys Planet website shows the activity box with a white insert that holds the tools, but ours didn't come with one.  I'm not sure if it's suppose to or not but the tools still fit into the tool box just fine without it.

 My little one couldn't wait to get his hands on the Cool Tool Activity Set.  I was getting him dressed when it came in the mail.  When he saw the box containing the activity set he gave me such a hard time that I had to let him go so that he could check it out, hence the pantless boy in the photo.

He was intrigued by opening the case at first, which is good because it helps him practice his fine motor skills and hand-eye coordination.

But it wasn't long until he moved on to the fun of banging, screwing and drilling.  I love the fact that once he screws down one screw, another will pop up to continue the fun.

I also like the fact that he could easily grasp and manipulate the tools.  He would have to hold them correctly, especially the screw driver and the wrench, to get them to fit into the slots on the screws (around the screws for the wrench).

As you've probably noticed, he was very focused on the activities at hand.  He seems to concentrate quite intensely and for long periods of time with this toy.

He loved spinning the gears to hear the music that plays.  The knob for the gears is small, thus he uses a pincer grasp to manipulate it...which I love to watch.  He seemed to enjoy watching the direction of the spinning gears.  Did you notice that little mirror on the big red gear?  That could be what he was looking at.  I think the mirror is a fun feature for little ones that are just getting to know themselves, and they get to watch themselves in action!

Best of all...It put this big, huge smile on his face, and I think that's the most important aspect of any toy!

If you want to get your hands on this or another fun, learning toy for the little person in your life, check out the Activity Toys for Toddlers section over at Educational Toys Planet
They have really reasonable prices and many of the toys are on sale right now.  They even have  top 10 toy lists sorted by age, gender, and just about any other way you can think of categorizing a list.

As always, the opinions stated in my review of this product are my very own.  I was not compensated outside of the product for my honest review of this toy.
Thanks for stopping by...don't forget to let me know what you think about this toy or any other Educational Toys Planet product that you've purchased.

~Blessings~
Claudea B.


Wednesday, January 26, 2011

It's Girl Scout Cookie Time!!!

That's right ladies and gentlemen...It's time to get your Girl Scout Cookie jones on!
All of your favorite flavors are ready for special order, Trefoils, Do-Si-Dos, Samoas, Tagalongs, and everyone's favorite, Thin Mints.  In addition, the delicious Lemon Chalet Cremes, Dulce De Leche, and the Thank U Berry Munch cookies are all available for the taking.

To kick off the big event Sunshyne and her friends attended the Sea World Cookie Rally for the Southwest Texas Girl Scout troops.

Over 2000 Girl Scouts were in attendance.  I don't think I've ever seen so many badges and fun patches in my entire life!

 So many Girl Scouts big and small
Blue, Brown, Green, Khaki
Uniforms large and small
Selling cookies
to one and all
Go Girl Scouts!
(I just made that up...wow!)


Do you see that little Girl Scout with her hand on her head...she was trying to think of the answer to a challenging trivia question.
Questions were part of a badge activities for the CPS energy booth...of course they had to have opportunities to earn patches/batches, isn't that what GS is all about???

By the way, she got it right and earned her CPS energy, Environmental Awareness patch!

Speaking of the CPS energy station, there were two other stations during the tailgate fun that kicked off the Sea World Cookie Rally.  Valero and HEB also sponsored patches for the girls...so BIG shout out to them for helping our girls to be the best they can be!

The Girls were able to earn the Health and Wellness patch from HEB and the STEM (science, technology, engineering, and math) patch from Valero.

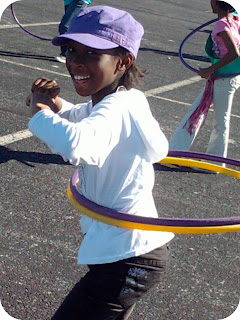
Sunshyne hulu-hooping her way to the Health and Wellness Patch.

Go Baby!

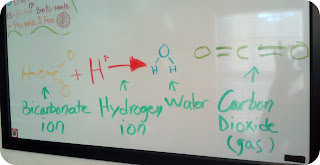
Here's her BFF doing her thang with TWO hoops!
Destined for greatness, this one!

The girls had a blast during the entire event.  They even had the opportunity to see Jonnie and Brookie perform, they were awesome and Sunshyne loved it!
Unfortunately, I didn't get any pictures of Brookie because my camera died by the time she rotated to our side of the stadium.

It was an awesome way to kick off the cookie sales for 2011, we were informed that the Girl Scouts have already sold over one million boxes!  Way to go girls, keep up the good work. 

To our friends and family, please send me an email to request your GS cookies this year.  Sunshyne needs to sell 1000 boxes to reach her goal.  We'll be happy to take your order's now and your cookies will be in by the second week of February.


Thanks for the support, Go Girl Scouts!

~Blessings~
Claudea B.


Tuesday, January 25, 2011

Beginning The Day With Meditation

When the new year began, I decided to begin our mornings with about 10 minutes of meditation.  So far, It's been a great way to start the day.  My initial reasoning for morning meditation is for the kids to increase their sense of peace and focus.  I've read that meditation helps to clear the mind for improved concentration.  Definitely needed in our class!

I've been using the Spa Style Rejuvenate CD...you can pick this up on Amazon for like $1.89 brand new.  It has six tracks of beautiful, relaxing music on there that are perfect for our meditation activity.  This is what the cover boasts:

"Celebrate inner calm while all your senses are nourished with soothing keyboard blends of strings, piano and percussion.  Listen. Feel. Release.  Healing is about to begin for complete rejuvenation of your inner self."

When I read this, I thought...Perfect!!!

For the price, this CD has not disappointed and I will continue using this with the kids until I add more meditation sounds to our collection.


I started the kiddos off watching a yoga DVD to show them the right form for posture, breathing and stretching.  I think this really helped them by having a visual to refer to versus me just explaining (I do the meditation too and hope to get the little one in on it as well).  They pretty much have gotten the hang of it now, but that big one there is as stiff as a board.

All in all, the process is relaxing and is an excellent beginning for our homeschool day.  Of course, that's just the morning...the remainder of our day can and DOES get a bit more chaotic.

Especially when daddy's home!


How do you start your homeschool day? 
Share your morning routine or something special that you or your whole family does to get started...sharing is caring!

~Blessings~
Claudea B.


Wednesday, January 19, 2011

Vinegar and Baking Soda Reaction Fun (Experiment)

Today we had a few guests over for class, a close friend of mine who also homeschools her kiddos.  We always have a good time when we get the kids together so I decided that we'd do a craft that I've been dying to try from The Mother Huddle blog using classic ingredients, vinegar and baking soda.  I decided (since it was school hours), to make it an educational venture as well.  Like I always say, why knock-out one bird when you can take out two with a single stone...hehehe! 


I followed the directions from the craft mostly just to give this exercise the special twist that makes it magical, but because I used it as a science project, I had to explain what we were doing in a little more detail which took away from the magic a bit.

I used four different food colors, I put a drop into each spoon, then covered the drop with about a half tablespoon of baking soda.  Next, I filled five glasses with 1/4 cup of vinegar and placed my trays out for the kiddos to get ready for the magic to happen.

We went over a print off that I made based on information that I found at Apple-Cider-Vinegar-Benefits.
They learned the chemical make-up of baking soda and vinegar as well as the symbols for each component as represented on the periodic table.
  
After which, the fun began! 

This little guy is who I wanted to keep my eye on just to see his reaction to the bubbling magic.  He did not disappoint me either.  I didn't get a shot with my time delayed not-so-smartphone, but the reaction was priceless just the same. 
His face lit up once the reaction started happening, he even had to take a few steps back (all the way to the refrigerator) and put his hand over his gaping mouth in his amazement.
I really wish I'd gotten the shot:(

I think all of the kiddos enjoyed the activity and perhaps even learned a little about gases and the two reaction that take place when baking soda and vinegar are mixed.
Little man definitely understood the acid base reaction after the experiment and the decomposition reaction that took place.  He actually explained it quite elegantly.

I loved the color twist from the craft, that gave this experiment the extra flare that it needed.  If I had to do it differently, I would have made the preceding lecture much shorter and let them get to the experiment faster and then talked about what happened and explained the symbols.

I gave them each a colored marker based on the color that they had during the experiment, and let them put together the molecular structure of the components that were used in the experiment...they did good!

All in all, I think it turned out well and it was a nice (educational) way to end our school day with our friends.

~Blessings~
Claudea B.


Tuesday, January 18, 2011

Butter Pecan Dutch-Style Pancake


As some of you know, I can appreciate a recipe that has three elements, quick, easy, and inexpensive.  I'm always excited to find a recipe that fits comfortably in my little categories.  This week I've decided to share a delicious little recipe that meets my standards and surpasses them.

Butter Pecan Dutch-Style Pancake...doesn't that just sound delish!  I love this recipe and so does the kiddos, it's great for breakfast, brunch, lunch, and dinner.  best of all, you can tweek it just about any way you want and have it in a variety of fabulous ways.


Here's what you'll need:

~1 cup whole milk
~6 large eggs (room temperature)
~2/3 cup granulated sugar
~1cup flour
~2 tablespoons of unsalted butter
~1/4 tsp. butter extract
~1/2 cup of chopped pecans
~Butter Pecan Syrup
~Pinch of salt
~Confectioners' sugar to dust (just to make it look pretty)

In addition to these items you'll need a cast iron skillet or a round casserole dish (in my case).

Preheat oven to 425 degrees and place skillet inside to warm to temperature.

Heat the milk up in a pot or microwave for a few seconds, just til lukewarm.  Blend the milk with the eggs and butter extract using a hand mixer or blender.  Next, add 4 tablespoons of granulated sugar and the salt and blend at a low speed to combine. Add the flour and blend until just combined. 

Pull out your skillet or dish and add butter into it, wait for the butter to melt and then add the batter.  Place batter in the oven and cook for 20 minutes or until the pancake is puffed and golden brown on the edges.  Remove from oven and dust with confectioners sugar, cut into wedges and serve with chopped pecans and butter pecan syrup.

Oh my, this is some good eatin.

There are several variations of this dish and two that I have found that also look delicious are in the Everyday With Rachael Ray magazine for Dutch Baby Pancake with Saute'ed Peaches and over at The Mother Huddles  for her German Pancakes (although I haven't tried these recipes yet, they both look devine).

If you've made these pancakes and have a different spin on them, I'd love to hear about it.  If you try my recipe or one of the others listed here, let me know what you think.
Thanks for stopping by!

~Blessings~
Claudea B.